Deployment
Production Setup
The Docker Quickstart works for local testing. Before going to production, follow this guide.
Checklist
- [ ] Keep
NODE_ENV=production(the default in the reference compose file) - [ ] Set
PUBLIC_URLto yourhttpsbase URL if you use approval gates - [ ] Set
ADMIN_SESSION_SECRET(32-byte hex) - [ ] Set
CREDENTIAL_MASTER_KEY(32-byte hex) - [ ] Configure CA-signed TLS certificates (or use reverse proxy with valid cert)
- [ ] Mount a persistent data volume
- [ ] Set up a reverse proxy (recommended)
- [ ] Change or delete default admin password
- [ ] Back up
./data/regularly - [ ] Keep the compose isolation settings:
user: "0:0",cap_drop: [ALL],cap_addSETUID/SETGID/KILL/CHOWN/SETPCAP,no-new-privileges,read_only: true,deploy.resources.limits.pids: 4096(see Docker) - [ ] Size
MCP_AMBASSADOR_CHILD_NPROCif you run browser-based MCPs
Environment variables
Generate secrets before deploying:
openssl rand -hex 32   # use for ADMIN_SESSION_SECRET
openssl rand -hex 32   # use for CREDENTIAL_MASTER_KEY
Set in docker-compose.yml:
environment:
  - NODE_ENV=production
  - ADMIN_SESSION_SECRET=your_64_char_hex_here
  - CREDENTIAL_MASTER_KEY=your_64_char_hex_here
Or pass via a secrets manager:
environment:
  - NODE_ENV=production
  - ADMIN_SESSION_SECRET_FILE=/run/secrets/session_secret
  - CREDENTIAL_MASTER_KEY_FILE=/run/secrets/master_key
secrets:
  session_secret:
    external: true
  master_key:
    external: true
Critical: If you lose CREDENTIAL_MASTER_KEY, all stored user credentials are unrecoverable.
TLS certificates
MCP Ambassador auto-generates self-signed certificates on first boot. For production, replace them with CA-signed certificates.
Option 1: Provide certificates directly
Mount certificates at startup:
volumes:
  - ./certs/server.crt:/data/certs/server.crt:ro
  - ./certs/server.key:/data/certs/server.key:ro
  - ambassador-data:/data
The server loads certificates from /data/certs/ on startup.
Option 2: Reverse proxy (recommended)
Let a reverse proxy handle TLS termination. The Ambassador Server listens on HTTP behind the proxy.
# In docker-compose.yml environment:
TLS_DISABLED=true
Then configure nginx, Caddy, or Cloudflare Tunnel as described below.
Reverse proxy
Caddy (simplest)
ambassador.example.com {
  reverse_proxy localhost:9443
}

api.ambassador.example.com {
  reverse_proxy localhost:8443
}
Caddy automatically obtains Let's Encrypt certificates.
nginx
server {
    listen 443 ssl;
    server_name ambassador.example.com;

    ssl_certificate /etc/letsencrypt/live/ambassador.example.com/fullchain.pem;
    ssl_certificate_key /etc/letsencrypt/live/ambassador.example.com/privkey.pem;

    location / {
        proxy_pass http://localhost:9443;
        proxy_set_header Host $host;
        proxy_set_header X-Real-IP $remote_addr;
        proxy_set_header X-Forwarded-For $proxy_add_x_forwarded_for;
        proxy_set_header X-Forwarded-Proto $scheme;
    }
}
Cloudflare Tunnel
cloudflared tunnel create ambassador
cloudflared tunnel route dns ambassador ambassador.example.com
# config.yml
tunnel: your-tunnel-id
credentials-file: /etc/cloudflared/credentials.json

ingress:
  - hostname: ambassador.example.com
    service: http://localhost:9443
  - hostname: api.ambassador.example.com
    service: http://localhost:8443
  - service: http_status:404
Downstream MCP isolation
Version requirement
These settings require v0.10.0 or later. Upgrade the image and the compose file together: user: "0:0" on a 0.9.x image runs the server and every MCP as root. Never set it on a 0.9.x image.
Since v0.10.0 every stdio MCP instance runs as its own unprivileged uid, with no capabilities, a private 0700 home and cache, and no access to /data. This depends on the container settings in the Docker guide; do not loosen them. The model is described in Security Model.
Production notes:
- The container starts as root (
user: "0:0") only for the entrypoint. The server itself runs as uid 1000. - Each MCP instance gets a process (thread) limit,
MCP_AMBASSADOR_CHILD_NPROC(default 256). Browser MCPs such as Playwright or Puppeteer spawn many threads: raise it for them. - The uid range (
MCP_AMBASSADOR_CHILD_UID_RANGE, default20000-20999) caps how many distinct MCP instances can have their own uid. The server logs a warning at 80% use; when the range is full, the least recently used idle uid is reclaimed and its home wiped, so widen the range. - The uid assignments are stored in
/data/child-uids.json(mode 0600). Include it in backups with the rest of./data/. ./datamust be owned by uid 1000../cache(mounted at/tmp) holds the per-MCP homes and package caches; it can be emptied at any time while the container is down.
See Configuration for the variables.
Verify your deployment
Replace <container> with your container name (for example mcpambassador-server):
# Server capabilities: all five Cap* lines end in e0 (SETUID, SETGID, KILL only), and NoNewPrivs is 1
docker exec -u 1000 <container> grep -E '^Cap|^NoNewPrivs' /proc/1/status

# PID 1 should be tini
docker exec -u 1000 <container> cat /proc/1/comm

# The MCP homes parent should be root:711
docker exec -u 1000 <container> stat -c %U:%a /tmp/mcp-homes

# Negative test: an MCP uid must not read /data. Expect "Permission denied"
docker exec -u 20000 <container> ls /data
Expected: e0 on every Cap line, NoNewPrivs: 1, tini, root:711, and "Permission denied" from the last command. Running a child process shows NoNewPrivs: 1 and CapPrm, CapEff and CapAmb of 0 (CapBnd stays at the inherited e0) (find its pid with ps, then read /proc/<pid>/status as uid 1000). With at least one MCP running, child-uids.json in ./data is mode 0600 and owned by uid 1000, and the MCP processes run with uids at or above 20000 (the default range).
Persistent data
All state lives in ./data/:
./data/
  ambassador.db          # SQLite database
  certs/                 # TLS certificates
  credential_master_key  # Master key (permissions 0600)
Use a named Docker volume or a host-mounted directory:
volumes:
  ambassador-data:
    driver: local
    driver_opts:
      type: none
      device: /srv/ambassador/data
      o: bind
Back up this directory regularly. The database and credential master key are your most critical files.
Creating the first admin
There are no seed accounts in any mode. On first start the server shows a setup wizard at https://<host>:9443, which creates the first administrator. It works only while no admin exists, so do it before exposing the server to anyone else.
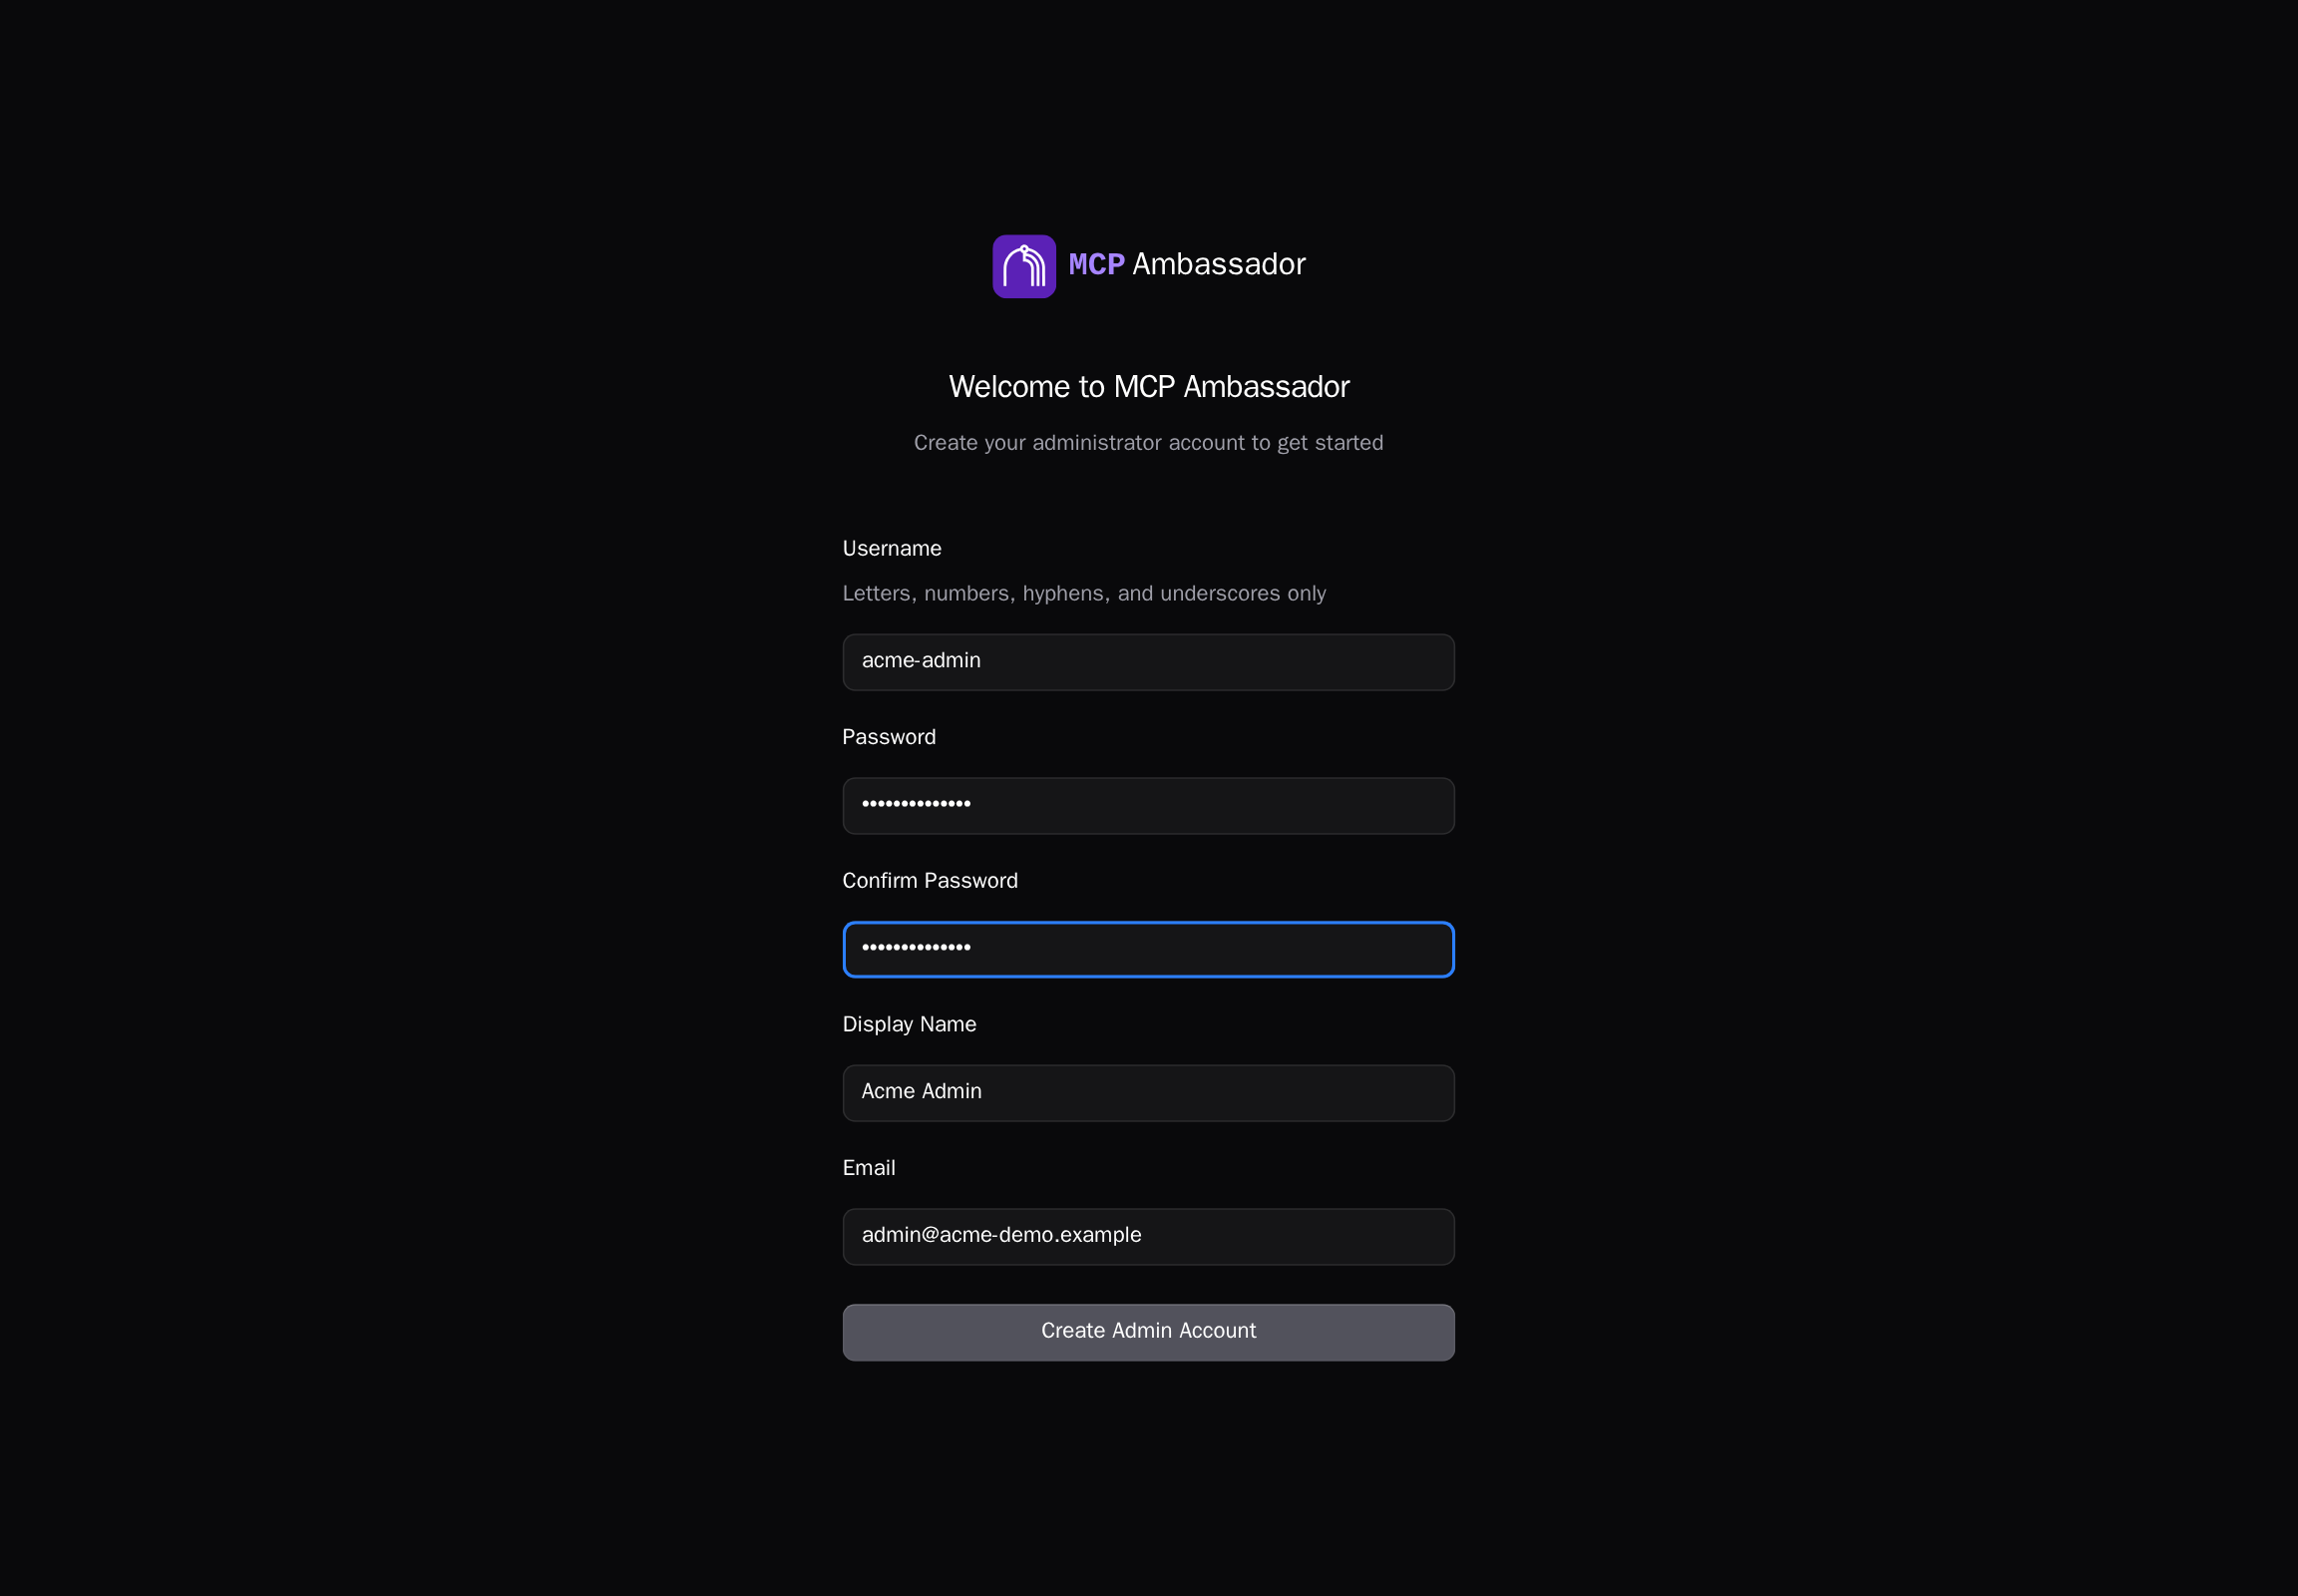
The server also writes ./data/initial-credentials.txt on first boot, with an admin API key (X-Admin-Key) and a recovery token. Store them in a password manager and delete the file. It is owned by uid 1000, so reading and deleting it on the host needs sudo.
Health monitoring
# Client API health
curl -k https://your-server:8443/health
# → {"status":"ok"}

# Admin API health
curl -k https://your-server:9443/health
# → {"status":"ok"}
These endpoints require no authentication and are suitable for load balancer health checks.